 Back To Frank's Boat Page

|
|
Refit Report from 2002, Alisa, a Bolger AS-29
|
|
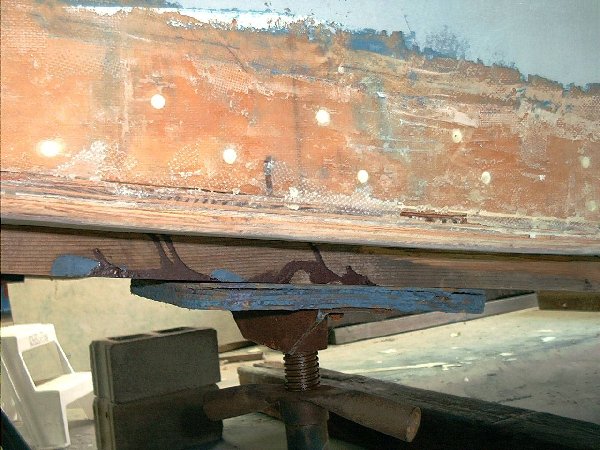
Chines: 94 hours
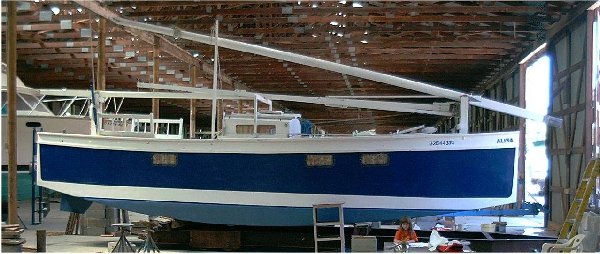
Alisa is very solidly constructed, the builder did a first rate job and she is in great condition
overall after 8 seasons of continuous use. When I bought her, I knew there would be work to do on
the mast, bow well and chines. For much of her life, the sheathing along the chines has allowed
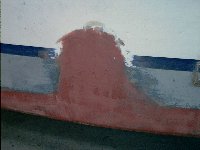
water into the boat. After I removed the old stuff from the chines, I counted 15 dark spots on
starboard and 20 on port, and numerous spots around the fasteners. There were air bubbles around
many of the fasteners on the port side - it looks like they were introduced over time due to
expansion/contraction maybe from the freezes they get up there on the St. Lawrence. I ground
all of these out with a grinder / sanding pad and filled with thickened epoxy before re-sheathing
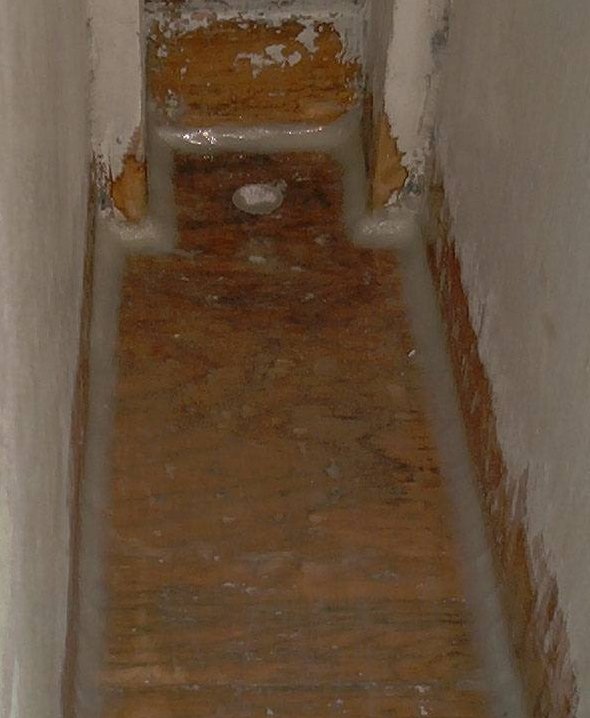
with 3 layers of 10 oz. The screws are stainless and the picture you see is the worst area of
the whole boat.
|
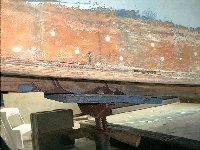
Chine repairs. Pre-grinder.(Larger View)
|
More chine repairs. after filling, before smoothing (Larger View)
|
The bottom of the boat is slighlty convex (which puzzled me until Bruce Hector mentioned on the
yahoo forum that his Micro is that way from the way he assembled the hull upside down). Also,
Alisa's chines were only 1/2" radius. These two factors combined to cause problems both in
blocking the boat for winter and launching the boat in the sling. I've worked out a gentler
blocking scheme and radiused the chines (using my drawknife and a plane and a grinder) to 1" and
added 3 layers of 10oz cloth cut at 45 degrees, which should give me an increased strength in
this area of 4 to 10 times. None of the black spots penetrated very far and I only found one
or two areas where I could easily chops stuff with my chisel. I filled these areas. I'll
have to take a look next spring to see if problems are getting worse. If so, I'll have to chop
out portions of the bottom and scarf in replacements (like I did with the mast).
I am very happy with the way the 10oz, 45 degree strips works on the chines. I used 8", 6" and 4"
widths, cut with scissors. The width gets narrower when applying because of the 45 degree cut.
I did the two 8" layers first (overlapping 2") and then the 4" last. Then I gloped loads of
stuff thickened with 50/50 microballoons and fused silica. I used Raka epoxy, which cures soft.
Much of the work was done in 90-98 degree F temperatures, which the Raka very slow hardener handles very well!
I experimented with biaxial cloth and 9 oz tape and the 10oz 45 degree stuff was the best by far
in quality of application. Robb White used 16 layers of 4 oz cloth on the bottom of his Rescue Minor
boat. I think that technique might be even better, thought it would involve more cutting.
|
Bilgeboard Trunks:
After launching I still had leaks into the boat. These are almost certainly
coming from bilgeboard wells. Figure 1 shows how the boat is now and what I intend to do to
fix it. The plans seem a little ambiguous on the subject, but John Dalziel's boat, Zoella,
is built like "AFTER." The current construction in Alisa prevented the builder from taping
the seam between the bottom and the trunk sides ("tape here" in the illustration)
Figure 1. Bilgeboard leaks
As a result, water gets in right along the dotted red line. I think I may be getting a little
bit of water from underneath the exterior chine as well.
|
Blocking:
A lot of damage was done to the chines while Alisa was in the slings and on blocks because of
the aforementioned convex bottom and sharp corners. I devised a pretty simple but effective
way to minimize stresses during blocking (Figure 2). After one launching and one haulout, I
can claim success! With the combination of armor plating on the chines plus the new blocking
system I have seen no damage, dents or cracks.
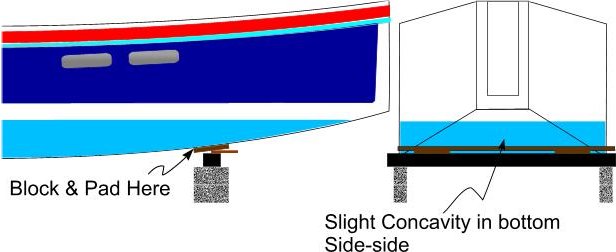
Figure 2 Blocking Arrangement
The key was supporting the 2"x10" bunks a few inches *inboard* of the chine, allowing
the bunk to bend to the concavity of the bottom. A bunch of old carpet didn't hurt either :-)
|
Bow well: 20 hours
I bought Alisa knowing I would be repairing some leaks, the most pronounced of which is in the bow well.
The failure was in the bond between the fillets and the epoxy coated plywood on the floor of the bow
well. Every piece of wood in the boat was epoxy coated before assembly. The wood is in great
condition (built in 1994). I can think of two explanations for the failure:
- insufficient surface prep before applying the fillets. I certainly can understand how
this might happen after spending 4 hours in that little space. It is a very hard area to get into.
- The fillets were too small. I think 1/4" radius isn't sufficient. Also there was no
stitch-n-glue style sheathing over the joints. I am sure more strength is required based
on the stresses imposed by the mast/tabernacle.
|
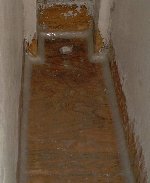
Repairs to the bow well. (Larger View)
|
I chopped out all of the old epoxy fillets, sanded the whole bottom down to the wood (epoxy primer
and polyurethane rust paint - whew!), laid down 1" + radius fillets and laid a layer of 7oz tape
plus another layer of 7 oz sheathing over the whole floor. Looks pretty nice. Talk about a
difficult space to work in though! 10" x 4' x 3'. My bones were creaky from all of that
contortion work :-)!
|
Mast Rot: 18 hours
Rot had set in to the foot of the mast where the lead weight is attached using screws and SS plates.
I suspect it happened during the winter, when the mast was horizontal and water and snow could
collect on the horizontal surface, since the rot was worst on the "top/forward" side of the mast!
|
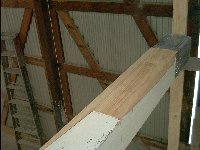
Replace rot in mast foot. (Larger View)
|
I had to scarf two 1 1/2 x 4 1/2 boards into two sides. I also had to make a wedge 13 x 1 1/2 x 9"
("stop for mast kevel"). That's four 4 1/2" x 15" scarf cuts plus a big 13" cut. I've made scarf
joints once before (for a mast) using a saw, hammer, chisel and a hand plane, but I was looking for
a more efficient way. I first tried by grandfather's 6" jointer (Big Power Tool) for the 13" wedge.
It was loud and dangerous and made a lot of dust, but it worked. My mast was still on its tabernacle
- the piece to be repaired was suspended 15' in the air, so I couldn't bring big power tools.
Instead, I marked the cut and made depth cuts every 2" with my Japanese saw.
Then I sharpened up the drawknife and chopped away.
It is amazing how much stock you can cut away in a short time with a sharp drawknife. wow!
I finished up with a Baily #4 plane and a bull-nosed rabbeting plane (total of $80 worth of
tools from various antique shops in Pennsylvania).
|
|
Filling the weave:
When I built my 15' sharpie, I figured fairing the hull was for sissies. After all, I wanted workboat finish and who would care if there were some rough spots. I sheathed bottom but not the sides. Filling the weave with a third or fourth coat of epoxy seemed purely optional.
All those articles and chapters in the books and magazines about fairing are merely the result of some misplaced 19th century yachting aesthetic that places a disproportionate value on form over function - right?
I'm not so sure.
After spending a weekend upside down sanding off poisonous bottom paint from an un-filled, un-faired bottom in order to effect some repairs to the sheathing, I've realized there is a very practical reason for fairing and filling - repairs!
|
Back to Frank's Boat Page
|